Resources
Seaweed Resources
For seaweed class students and enthusiasts alike, I have compiled a list of resources for where to buy seaweed, seaweed books, studies, radiation and more. Please check these out!
Seaweed Education with Kristy Bredin
Upcoming field and online Seaweed Classes
Marine Herbalism Class Recording
Top 10 Ways to Make Seaweeds a Part of Your Life Class 10.15.2024
Seaweed Products
Rising Tide Sea Vegetables (CA coast)
Nature Spirit Herbs: wild harvested seaweeds (and some info), herbs, and mushrooms (based in OR)
BC Kelp: Seaweeds harvested off the the remote Queen Charlotte Islands (Haida Gwaii) in BC
Mountain Rose Herbs: A variety of certified organic seaweeds; good source for seaweed flakes and powders.
Salish Sea Greens: Lummi Island farmed seaweeds
Canadian Kelp Seaweeds from Barkley Sound BC. Louis D. Dreuhl’s, author of Pacific Seaweeds, company
Algal Aid: Product using red seaweed gel for topical viral outbreak application. This product seems to no longer be available.
Maine Coast Sea Vegetables: One of the primary reputable seaweed harvesters in Maine. Seaweeds for sale and lots of great learning as well. They also have a large array of seaweed topical products without a lot of additives: https://seaveg.com/collections/bath-body
Landsea Gomasio: Bullwhip kelp-based gomasio condiment made on Orcas Island, WA.
Barnacle Foods: They have kelp pickles and their hot sauce is pretty great too!
Ascophyllum seaweed fertilizer that can also be used for bulk seaweed purposes, such as seaweed baths: https://theseaweedman.com/product/fertilizer-2/
Seaweed Fiber Yarn (About Seacell)
Salish Sea Activism
Puget Sound Restoration Fund: Projects throughout Puget Sound to restore marine resources and create healthy ecosystems. Bullwhip Kelp Restoration Project
Puget Soundkeeper: Initiatives to tackle pollution of Puget Sound waters from a wide range of sources, such as industrial agriculture, sewage, fossil fuel production, and stormwater runoff.
Bullwhip Kelp Story Map: Map of historical kelp beds in the San Juan Islands compiled through Samish Tribe oral tradition.
SeaTrees: Restoring Coastal Ecosystems
Radiation/Pollutants
Kelp Watch: Study of kelp samples from the west coast of the Pacific Ocean (Alaska-California) for Fukushima-specific radiation.
Our Radioactive Ocean: Post-Fukushima maps and data on radiation levels over time on the west coast of the Pacific Ocean (Alaska-California) since the Fukushima nuclear disaster.
Heavy Metals and Living Systems: An Overview
Heavy Metal Exposures and Alzheimer’s Disease and Related Dementias
Jennifer Hahn’s Chemical Contaminant Levels in Edible Seaweeds of the Salish Sea and Implications for Their Consumption
Seaweeds and Health
Ryan Drum: In-depth articles on seaweeds as food and medicine.
Ryan Drum’s story on healing knee cartilage with bladderwack: http://www.ryandrum.com/radiationprotectionusingseaweeds.htm (scroll down to “Jean’s Knees” under External Uses of Seaweeds)
Old Man and the Seaweed, a documentary on Ryan Drum by David Kaufman
http://www.irishtimes.com/news/health/is-there-any-science-behind-benefits-of-seawater-therapy-1.472923
http://www.organicfacts.net/health-benefits/other/health-benefits-of-seaweeds.html
http://www.ncbi.nlm.nih.gov/pmc/articles/PMC2920542/
https://www.mdpi.com/1660-3397/17/6/327/pdf-vor
https://www.ncbi.nlm.nih.gov/pmc/articles/PMC2920542/
https://www.ncbi.nlm.nih.gov/pmc/articles/PMC3131239/
https://onlinelibrary.wiley.com/doi/full/10.1002/fsn3.1835
https://www.ncbi.nlm.nih.gov/pmc/articles/PMC5706042/
https://www.mdpi.com/1660-3397/15/11/353/htm
Iodine & Thyroid
http://www.sciencedirect.com/science/article/pii/S1021949814000155
https://seaveg.com/blogs/articles/should-i-eat-seaweed-to-get-iodine
https://www.researchgate.net/publication/226526196_Chemical_Species_of_Iodine_in_Some_Seaweeds_II_Iodine-Bound_Biological_Macromolecules
The Iodine Crisis, Lynne Farrow
https://www.frontiersin.org/articles/10.3389/fpls.2021.616868/full
https://link.springer.com/article/10.1007/s00217-012-1693-z
https://www.ncbi.nlm.nih.gov/pmc/articles/PMC7697291/
https://napiers.net/blogs/health-information/how-much-iodine-is-there-in-seaweed
http://www.ryandrum.com/thyroidpart2.htm
https://seaveg.com/blogs/articles/bromine-bromide-bromate-seaweed
https://seaveg.com/blogs/articles/should-i-eat-seaweed-to-get-iodine
Seaweed ID, Cooking, and more!
algaebase.org
seaweedsofpnw.com
https://www.nhbs.com/blog/guide-uk-seaweed-identification
Seaweeds of the Pacific Coast, Jennifer Mondragon
Pacific Seaweeds, Louis Druehl
Common Seaweeds, Robert Waaland
The Sea Vegetable Book, Judith Cooper Madlener
North Pacific Seaweeds, Rita M. O’Clair and Sandra Lindstrom
Field Guide to Seaweeds of Alaska, Mandy R. Lindeberg
Keys to the Seaweeds and Seagrasses of Southeast Alaska, British Columbia, Washington and Oregon
Common Edible Seaweeds in the Gulf of Alaska, Dolly Garza
Prannie Rhatigan, Irish Seaweed Kitchen
Shep Erhart and Leslie Carrier, Sea Vegetable Celebration
Valerie Cooksley, Seaweed
https://pacificharvest.co.nz/seaweed-blog/what-is-irish-moss/
https://gallowaywildfoods.com/dulse-identification-edibility-distribution/
https://www.seaweedandco.com/the-benefits-of-dulse-are-making-waves/
https://cdnsciencepub.com/doi/pdf/10.1139/b84-303
https://www.ncbi.nlm.nih.gov/pmc/articles/PMC6266857/
https://link.springer.com/article/10.1007/s10811-013-0014-7
seaweed commons.org
Kitchen Alchemy Blog/Modernist Pantry: a lot of awesome blog entries and videos about working with hydrocolloids (carrageenan, alginate, agar) to create gels. They work with isolated mucopolysaccharides, but some of this information can be applied to whole-form seaweed gel extraction and use. Search blog for “carrageenan” and a lot of great videos and recipes will come up!
Seaweed Artwork
https://www.youtube.com/watch?v=y75dmbiGfHE
https://www.youtube.com/watch?v=3J3zQsYdUek
https://www.youtube.com/watch?v=ZbBQrMWw_LA
Mucopolysaccharides
https://www.ncbi.nlm.nih.gov/pmc/articles/PMC3433884/
https://www.ncbi.nlm.nih.gov/pmc/articles/PMC3093253/
https://www.ncbi.nlm.nih.gov/pmc/articles/PMC4446605/
https://www.ecronicon.com/ecnu/pdf/ECNU-14-00556.pdf
https://cedar.wwu.edu/cgi/viewcontent.cgi?article=1343&context=scholwk
Seaweed Recipes/Instructions
-
Red Seaweed Gel Extract Instructions
To extract the carrageenan from red seaweeds, the seaweeds need to be cooked in water.
You can put the seaweed in a Victoria’s Secret mesh laundry bag for delicates (or the equivalent, such as jelly bags) for ease in re-steeping and removing more and more gel.
Another option is to put the seaweed in the pot of water directly and press it through a mesh strainer before use.
Combine 1/2 ounce of red seaweed (Gigartina/Mastocarpus, Iridaea, Irish Moss) with 1-2 quarts of water in crock pot or pot.
Bring to boil and simmer for ½ to 4 hours on the stove or 8-12 hours on low in a crock pot.
Occasionally stir or pump the gel out of the seaweed to enhance extraction.
The same red seaweed used in the first steep can be re-used in 4-5 more batches of water for additional gel extraction.
The nutrients in red seaweeds feed bacteria even at temperatures near freezing, so keep gel refrigerated AND re-sterilize it by bringing it to a boil every day or every other day.
In addition to its own medicinal properties, red seaweed gel is a great medium for medicine making with some of our favorite land plants. I like to extract anti-infective herbs in red seaweed gels for extra potentcy and sticking power for throat and intestinal infections. Traditionally in many countries, a delicious drink is made with red seaweed gel and aromatic spices, such as cinnamon and nutmeg (and whiskey for the Irish!). Red seaweed gel can also be used as an egg replacement in vegan baking, and to add texture to many other culinary delights!
Seaweed mucopolysccharides can be complicated to work with in the kitchen, especially when using whole seaweeds (not isolated hydrocolloids). Kitchen Alchemy has a lot of great blog entries and videos about working with hydrocolloids (carrageenan, alginate, agar) to create gels. They work with isolated mucopolysaccharides, but some of this information can be applied to whole-form seaweed gel extraction and use.
-
Seaweed Hair Rinse Instructions
Add about 1oz of dried kombu (Saccharina/Laminaria spp.) or bladderwrack (Fucus spp.) seaweed to a polyester mesh bag to enclose. Fresh bladderwrack and Fucus can be used as well—a handful or about 1 cup. Fresh seaweeds may require more heat or agitation to extract gel. Other brown seaweeds may work, but kombu and bladderwrack are the best to create a good gel.
Put bag in quart ball jar, add luke-warm water, and seal jar.
Shake jar every so often over the course of 30 minutes to an hour to extract gel or leave standing for 4-8 hours until gel forms.
Massage into hair and scalp. Best to leave the gel in your hair without rinsing, it but can be rinsed out with water if needed. Do not get seaweed down your drain.
Gel can be stored in the fridge, but use within 48 hour of making.
-
Kelp Pickles Recipe
Learner Limbach 2019
Ingredients (for 12 pint jars)
2 bullwhip kelp whips, cut into small rounds
Brine
6 pints water (12 cups)
3 pints vinegar (6 cups)
½ cup salt
Spices
½ tsp mustard seed
½ tsp black pepper corns
¼ tsp whole coriander
¼ tsp red chili flakes (or sub any hot pepper fresh or dried) *for light spice - omit if you don’t like spicy or increase for extra spicy
¼ tsp turmeric and/or curry
¼ tsp dill weed (or sub fresh dill weed and/or dill umbel)
3-4 cloves of fresh garlic (can sub or add fresh garlic scapes)
A few slices fresh onion
2 small-medium sized grape leaf (this prevents the kelp rings from getting mushy over time)
2 bay leaves
1. Make brine for pickles
Calculate how much brine you will need for your Kelp Pickle batch. You will need about 9 pints of brine for 12 pints of pickles.
In a cooking pot, combine vinegar and water at two parts water and one part vinegar (6 pints water and 3 pints vinegar will cover a 12 pint case of canning jars.) Use distilled white vinegar and clean water.
Mix in salt to taste. It should taste like a pleasant amount of salt. About 1 cup per two gallons of brine. *Note: Use non-iodized pickling/canning salt. (regular table salt can cause discoloring and cloudiness due to the iodine and other additives)
2. Add Spices to jars (Organic if possible)
For the recipe below I have provided measurements as close as I could come up with for a recipe, but the general idea is to not be confined to one recipe, and to experiment to figure out what you like best. I experiment every year to try out different variations. Sometimes I am lacking a spice or I have something new and different available in season.
For 1 pint of Kelp Pickles
½ tsp mustard seed
½ tsp black pepper corns
¼ tsp whole coriander
¼ tsp red chili flakes (or sub any hot pepper fresh or dried) *for light spice - omit if you don’t like spicy or increase for extra spicy
¼ tsp turmeric and/or curry
¼ tsp dill weed (or sub fresh dill weed and/or dill umbel)
3-4 cloves of fresh garlic (can sub or add fresh garlic scapes)
A few slices fresh onion
2 small-medium sized grape leaf (this prevents the kelp rings from getting mushy over time)
2 bay leaves
3. Chop Kelp into rings (3/8 inch) and pack in jars, filling only up to the jar lid threads. Kelp ring thickness needs to be consistent in order to hold chevre well.
4. Bring brine to a rolling boil and keep it boiling while you scoop it into the jars, covering kelp rings.
*Meanwhile, in a small pot of water, sterilize canning lids by boiling for 10 minutes.
*Fill jars quickly! Otherwise the heat will escape and they will not seal
5. Once jars are filled place sterilized lids on jars, set aside and wait for them to seal.
Note: If any jars have not sealed in 2 hours they probably won’t without extra help. Put these unsealed jars in a bath of boiling water for 5-10 minutes and then remove them to get them to seal. They should seal soon after you take them out of the boiling water.
Recommendations for kelp pickle use: on tacos, burgers, salads. Stuffed with chevre (goat cheese) and eaten directly. The brine and spices are also great in rice and beans, potatoes, salad dressings, and more!
-
Seaweed Drying Instructions
Despite the fact that there are few reports of incidents of acute toxicity or poisoning related to seaweed consumption, folks interested in foraging seaweeds should do their own research—consult with multiple field guides, seaweed books, reputable online resources, and/or local instructors to learn about safe and sustainable harvesting practices and how to properly identifying edible seaweeds in your area. Stick with easy-to-identify, known edible seaweeds as you embark on your intertidal explorations. Always harvest with caution and discernment—be aware of toxic seaweed species and potential contamination sources, such as off-shore sewage or waste-water disposal, industry, etc. Rinsing (with clean fresh water or salt water), properly drying and storing, pre-soaking and discarding soak water, and cooking seaweeds before consuming are some practices that can help reduce potential contaminants, though there are no guaranteed methods for eliminating all potentially toxic elements from seaweeds. Purchasing seaweeds from organic harvesters that properly process seaweeds and do regular testing for a range of contaminants is one of the best ways to limit the risk of consuming toxic or contaminated seaweeds.
Seaweed harvesting regulations vary from state to state. Be sure to check out your state regulations and licensing requirements before harvesting. Also be aware of private property and particular beach access regulations. Sustainable harvesting recommendations, in addition to those specific to state regulations, include harvesting no more than 10-25% of seaweeds in a stand and rotating harvest locations to give each site time to recover. Always use what you collect and never collect more than you can use.
What you will need to dry seaweeds at home:
If you have two sunny, dry days in a row, most seaweeds will dry outside on a cotton or stainless fishing wire line.
If drying indoors, you must have a heat source to complete the seaweed drying process, or be able to finish it outdoors in the sun. Unlike land plants, seaweeds are extremely hydrophilic—they attract and reabsorb moisture from the air readily. Wood stoves or other ambient heat sources are recommended for indoor drying. (Note: Do not let seaweed drip on your wood stove--it will leave salt and rust that will need to be removed.)
The surface and medium on which you choose to dry seaweeds is important for a couple of reasons: seaweeds will stick to and be hard to get off certain surfaces and seaweeds absorb metals and other elements from the surfaces on which they are hung. For this reason they can degrade and eat through metal and other organic materials such as cotton over time.
Indoors, they can be hung on non-galvanized nails, spaced at least 4 inches apart. Some new nails may be coated with a finish that comes off on your hand. If this is the case, soak the nails in vinegar for 20-30 minutes and then boil in water for 20-30 minutes to start removing the finish. Rust on the nails is ok.
Fishing wire and cotton or polyester clothes lines can also be used for hanging seaweeds indoors or out.
Whether drying indoors or outdoors, on nails or a line, you will need clothespins to attach each piece of seaweed you hang. (Clothes pins will need to be removed when seaweeds are partially dry.)
Some smaller seaweeds, such as nori and gigartina, can dry on racks covered in polyester sheets. Most other seaweeds are best dried hanging.
Whether drying outside on sunny days or inside with or without a heating element, it is super important to make sure your seaweeds are completely dry before storing. You may need to finish drying your seaweeds with heat. We recommend either finishing seaweeds near an ambient heat source, such as a wood stove, or laying the mostly dried seaweed in a thin layer in a metal or ceramic baking tray and putting it in the oven at the lowest setting (warm). Turn the oven on and off from this setting (every 10 minutes or so) to keep the heat minimal. Or finish drying outdoors on a dry, sunny day. Seaweed is completely dry when the pieces crack with a sharp/loud snap.
Generally a dehydrator is not recommended for seaweed drying. The seaweed may stick to the racks. However, some of the plastic, round-rack dehydrators with more open thick-plastic grating can work for drying a small amount of seaweed.
Depending on the seaweed, you may do a freshwater rinse to remove snails and some salt before hanging. If rinsing seaweed, you will need a plastic or metal screen rack (or colander) to drain the seaweeds before hanging. Thoroughly squeeze extra water from the seaweeds as they won’t release much water readily.
Seaweed should be stored in moisture-tight containment away from sunlight and will last years if well protected. Doubled ziplock bags or a food grade plastic bucket with a good sealing lid are recommended. *Ball jars are not recommended as they don’t seem to keep out moisture well enough.* Though some vitamins degrade in dried foods over time, many of the minerals and micronutrients in seaweeds remained preserved.
-
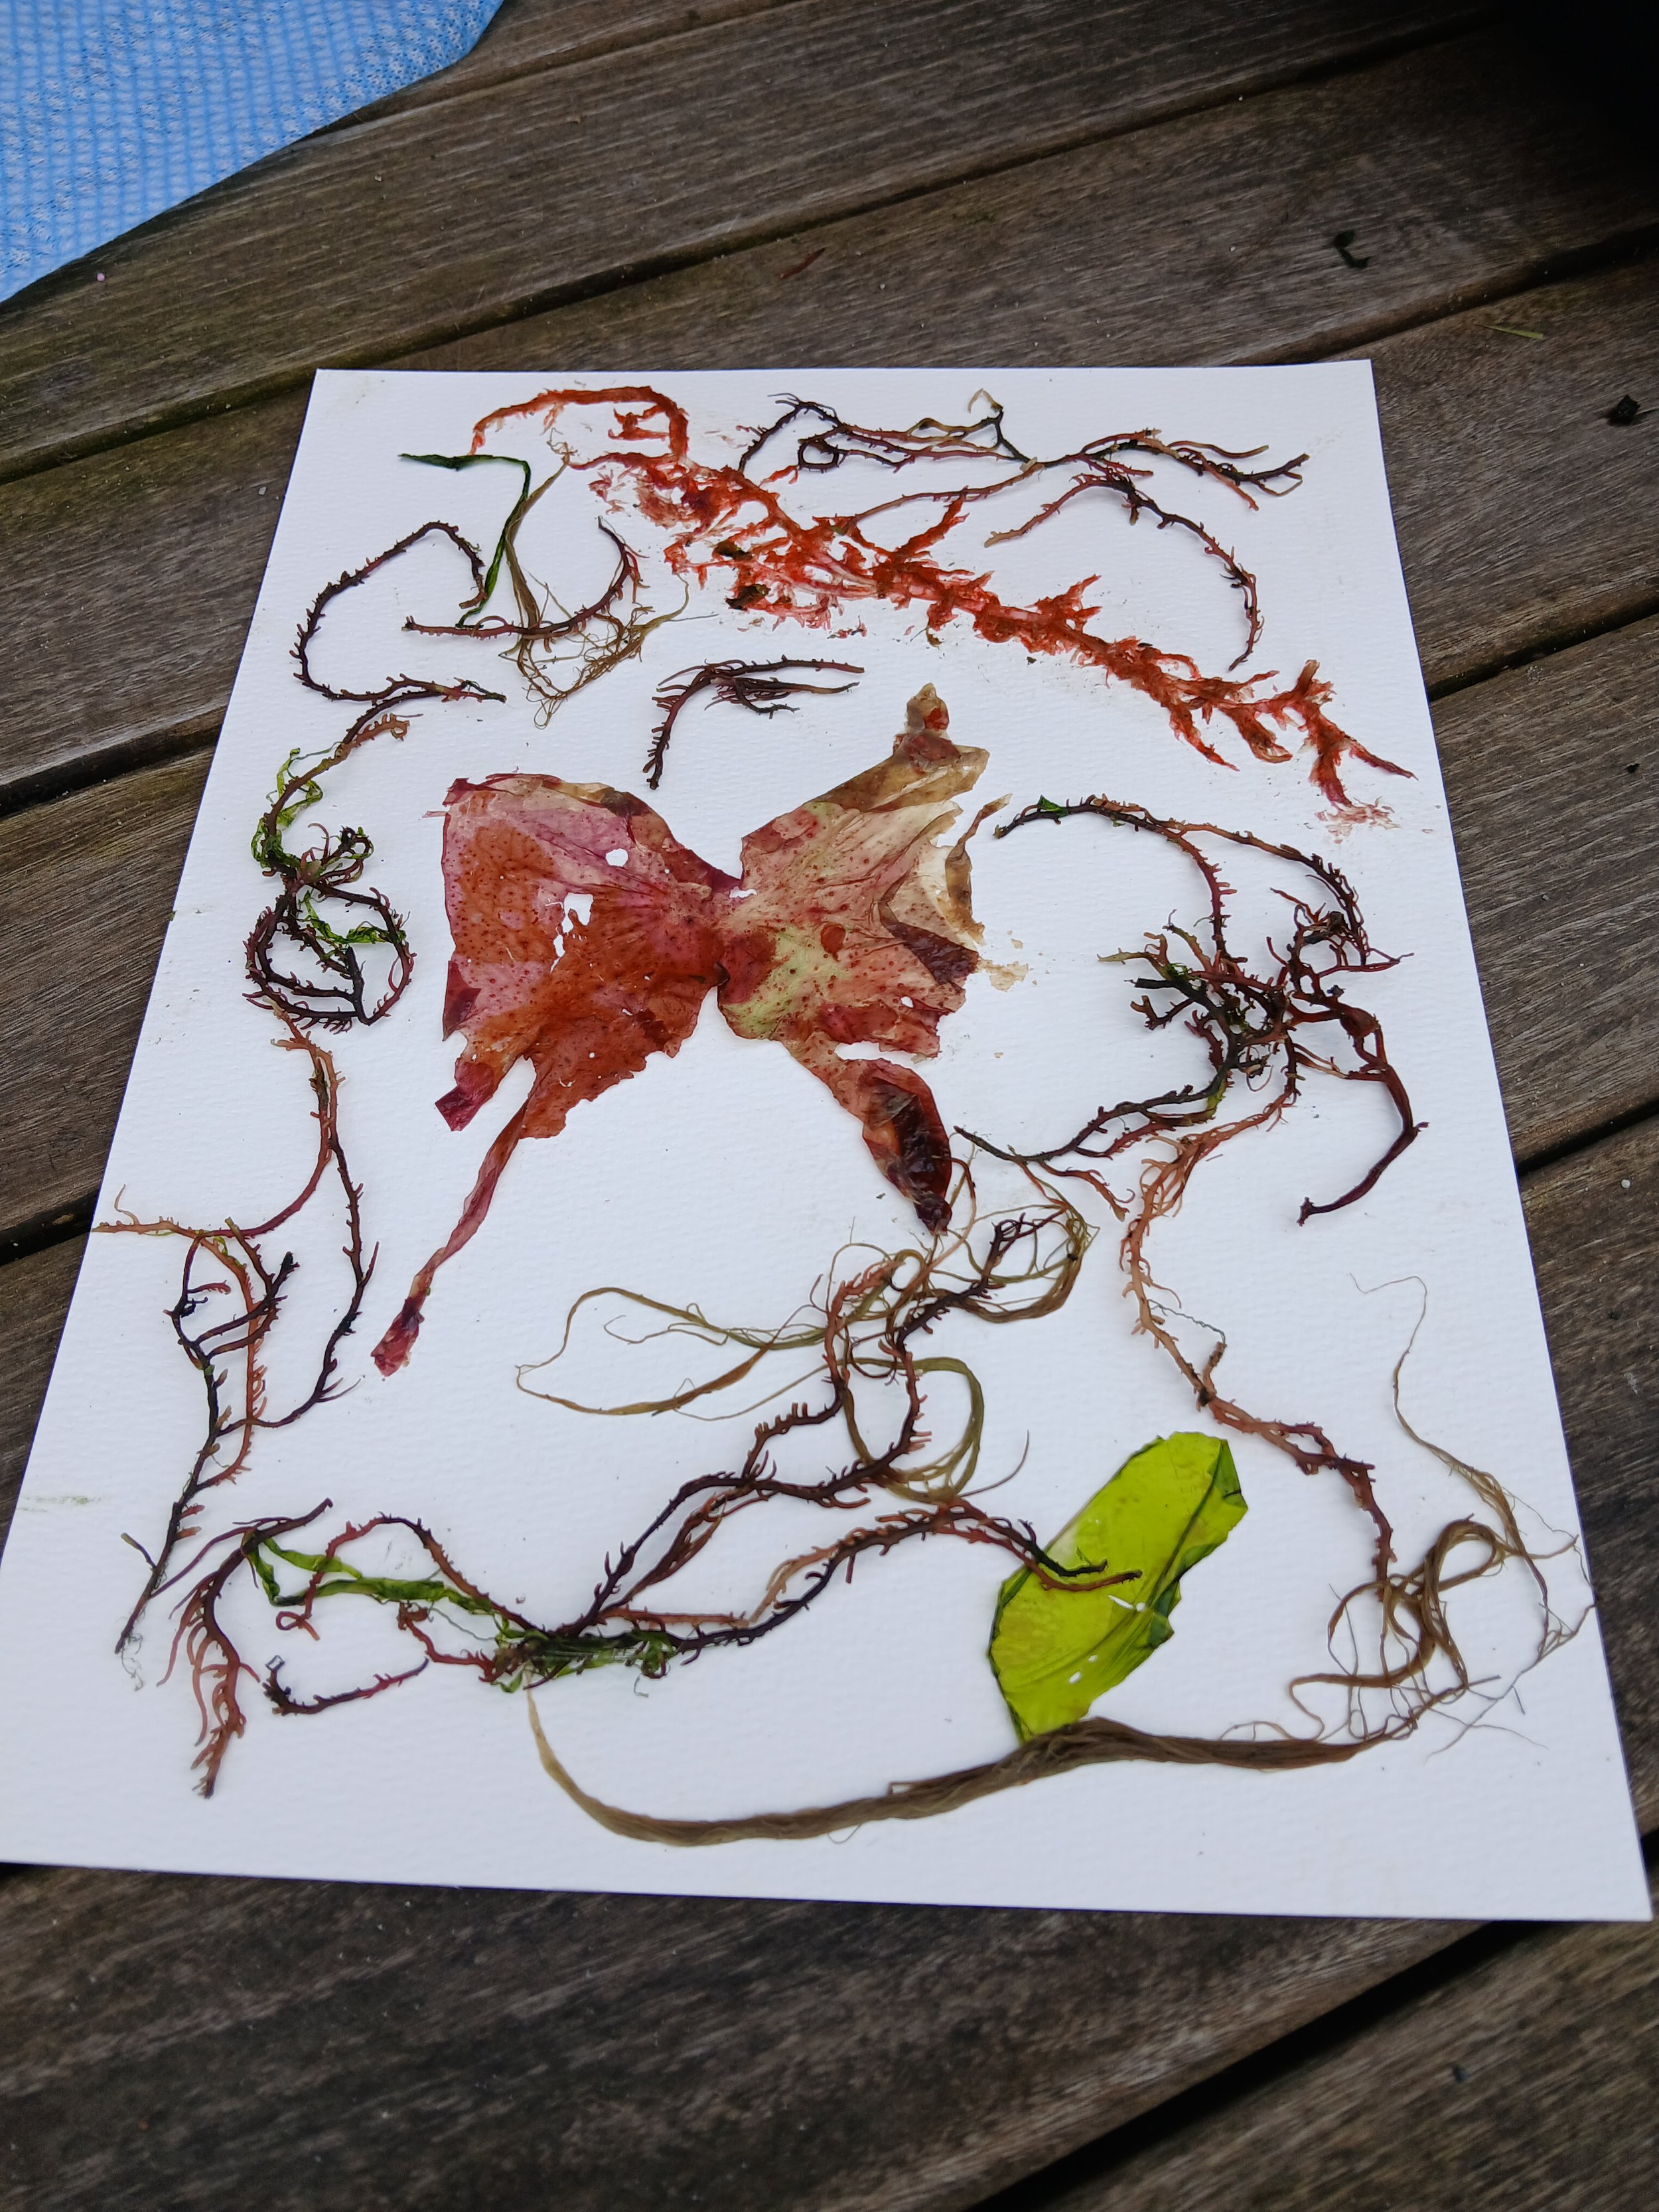
Seaweed Artwork
Inspired by Pacific Seaweeds
You will need:
Blotting or herbarium paper or watercolor paper
Clean cloths with satiny finish, or disposable
At least 2 pieces of cardboard
Newspaper to layer
A plant/flower press or weighted set up (heavy books) for pressing
Seaweed Pressing Process:
Plants are arranged on herbarium paper or watercolor paper into desired design.
Tips for arranging:
You can float paper and seaweeds in water to aid in arranging the seaweeds. This method is helpful for setting more delicate, filamentous seaweeds; however, lifting paper out of water with seaweeds in place is tricky and needs to be done with care.
Float in a thin layer of water. Can use a syringe to move water through seaweeds and aid in arrangement. Peel paper out and allow excess water to drip off.
Seawater is best to use to preserve integrity of seaweeds.
Partially drying seaweeds and then blotting with water as you are setting can be helpful for arranging.
Skewers, paintbrushes, tweezers, and pencils can be used to manipulate and place seaweeds.
You can use a template to shape, like a cut-out inverse circle to make a wreath-shape within.
For seaweeds with more moisture or denser tissues, squeeze excess liquid out of bladders, or cut a cross section (as in bullkelp whip), before setting.
Cover your design with a clean cloth (silky texture or disposable polyester dishcloths/rags work best for not sticking to seaweed and can be re-used).
3-4 cloths above and below pressing, plus newspaper, are recommended for absorbing moisture.
Sandwich cloths and paper with seaweeds between layers of newspaper (to absorb moisture).
Sandwich newspaper layers between corrugated cardboard (creates flat surface for pressing and allows airflow)
Compress in a plant/flower press or by laying on a flat surface with a weight placed evenly on top (heavy books).
Take care to press flat and evenly.
Carefully check pressing (without disturbing artwork—do not fully open) after 24 hours for moisture. Replace any excessively damp layers to avoid mold.
Let set at least one week (until plants are dry). Check periodically to avoid mold and change out newspaper and cloth layers as needed.
When dry, carefully remove layers to reveal your design.
Preserve your art away from moisture and UV light.
Laminate or frame in museum grade glass; spray with UV protective sprays and/or hang in a dark area.
If needed, seaweeds can be affixed to paper with Elmer’s glue.
For more information, check out these videos:
https://www.youtube.com/watch?v=y75dmbiGfHE
https://www.youtube.com/watch?v=3J3zQsYdUek